Imagine stepping outside after a swim and rinsing off under your own outdoor shower. You can enjoy fresh air, stay clean, and turn your backyard into a private retreat. Many homeowners love adding a diy outdoor shower kit to their space. Outdoor showers bring comfort, make life easier, and add a touch of luxury. You do not need fancy skills for shower installation. With a few diy tools and tips, you can create a relaxing spot at home. A filtered outdoor shower head can even help your skin and hair feel their best.
Key Takeaways
Outdoor showers make life easier and feel fancy. You can wash off dirt, sand, or sweat outside. This helps keep your house cleaner.
Pick a private spot that drains water well. Make sure it is close to a water source. This will make your outdoor shower easy and comfy to use.
Choose a strong shower head that can handle bad weather. It is best if it has a filter. This helps protect your skin and hair. You will also get clean water.
Get all your materials and tools before you start. Use simple plumbing like PEX piping and push-fit fittings. These make the shower easy to put together.
Clean your shower often. Change the filters every few months. Get it ready for winter. This will help your outdoor shower last for many years.
Benefits
Practical Uses
You might be surprised by how many ways you can use an outdoor shower. It is not just for rinsing off after a swim. Many homeowners find that an outdoor shower makes life easier every day. Here are some top uses:
Rinse off sand, chlorine, or dirt before you step inside. This keeps your home cleaner and saves you time on chores.
Wash up after gardening. You do not have to track mud or grass clippings through the house.
Clean off after outdoor activities. If you play sports or have kids who love to run around, an outdoor shower helps everyone stay fresh.
Enjoy a spa-like experience right in your backyard. Outdoor living experts say an outdoor shower can make your space feel like a private retreat.
You can see how an outdoor shower adds both convenience and a touch of luxury to your routine.
Comfort and Health
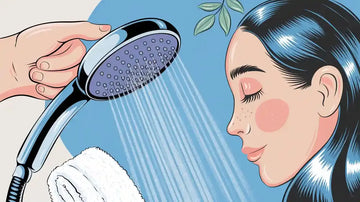
An outdoor shower does more than just clean your skin. It can help you feel relaxed and refreshed. Imagine stepping under cool water after a hot day. You wash away sweat and stress at the same time. If you use a filtered shower head, you protect your skin and hair from harsh chemicals and heavy metals. This means softer hair, smoother skin, and fewer worries about water quality.
You also get to enjoy fresh air and sunshine while you shower. This boosts your mood and helps you feel more connected to nature. An outdoor shower can turn a simple rinse into a daily treat for your body and mind.
Location
Choosing the right spot for your outdoor shower makes a big difference. You want a place that feels private, has easy water access, and drains well. Let’s break down what you need to think about.
Privacy
You probably want to rinse off without feeling like you’re on display. Privacy matters for comfort and peace of mind. Many people use fences, tall plants, or screens to create a secluded area. Some even use a mix of walls and greenery for a natural look. Here are a few tips to help you find the best spot:
Pick a spot that’s hidden from neighbors or busy streets.
Use bushes, trees, or a privacy screen to block the view.
Try to keep a nice view at eye level, so you can enjoy your yard while you shower.
Tip: If you have a scenic backyard, frame your outdoor shower so you can enjoy the view but still feel private.
Water Access
You need a steady water supply for your outdoor shower. The easiest way is to place it close to your house, pool, or hot tub. This keeps the plumbing simple and helps you avoid long, wet walks. Here’s a quick look at common water sources:
Water Source Type |
Pros |
Cons |
|---|---|---|
Garden Hose |
Easy setup, low cost |
Limited by hose length, pressure varies |
Home Main Water Supply |
Reliable, hot/cold options |
Harder to install if far from house |
Underground Water Pipes |
Permanent, clean look |
Expensive, needs digging |
Outdoor Faucets |
Affordable, simple |
Pipes can look messy, weather risk |
Portable Water Tanks |
Great for remote spots, portable |
Needs refilling, limited water |
Solar Showers |
Eco-friendly, no power needed |
Water temp depends on sun, small tank |
Most people choose a spot near existing plumbing. This makes your outdoor shower easier to use every day.
Drainage
Good drainage keeps your shower area clean and safe. You don’t want water pooling or causing mud. Here are some top drainage options:
Gravel Drain Pit – Water drains through gravel into a pit below. Works well for sandy soil and light use.
French Drain – A pipe in a gravel trench moves water away. Great for heavy use or clay soil.
Dry Well – A deep hole with gravel collects and spreads water underground. Handles lots of water.
Trench Drain with Grate – A channel under the shower collects water fast. Best for tiled or concrete bases.
Linear Drain – A modern drain along one edge, good for decks or patios.
Greywater System – Collects used water for your garden. Good for eco-friendly homes.
Note: Always slope your shower base so water flows away from your house. This helps prevent damage and keeps your outdoor shower area dry.
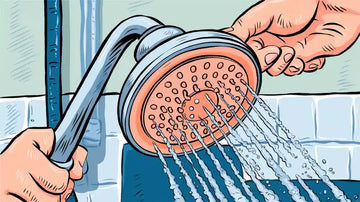
Outdoor Shower Head Selection
Choosing the right outdoor shower head can make your outdoor shower experience much better. You want something that works well, lasts a long time, and keeps your water clean. Let’s look at what you should think about before you buy.
Types
You have a few choices when it comes to outdoor shower fixtures. Some people like a simple fixed shower head. Others want a handheld option for more control. You can even find rain-style heads that give you a gentle, wide spray. Here’s a quick table to help you compare:
Type |
Best For |
Features |
|---|---|---|
Fixed |
Quick rinses |
Easy to install |
Handheld |
Washing pets/kids |
Flexible, easy to aim |
Rain-Style |
Relaxing showers |
Wide, soft spray |
Think about how you plan to use your outdoor shower. If you want to wash off after swimming or gardening, a fixed head works great. If you need to rinse off sandy feet or clean gear, a handheld option might be best.
Durability
Your outdoor shower head needs to handle sun, rain, and wind. Look for materials like stainless steel or high-quality plastic. These last longer outside. Weather-resistant finishes help prevent rust and fading. You want your outdoor shower to look good and work well for years. The Cobbe DS Filter Shower Head stands out because it uses strong materials and a smart design. You can install it quickly, and it holds up in all kinds of weather.
Tip: Always check if your shower head is made for outdoor use. This helps avoid problems later.
Filtration Features
Clean water matters, even outside. Some outdoor shower heads come with built-in filters. These remove chlorine, heavy metals, and other things that can hurt your skin or hair. The Cobbe DS Filter Shower Head is a great choice here. It uses a 20-stage filter system to give you fresh, safe water every time. You get five spray modes, so you can pick the one you like best. The filter is easy to change, and you don’t need special tools. If you care about health and comfort, a filtered outdoor shower head is a smart pick.
A good filter can turn your outdoor shower into a spa-like treat. You feel cleaner and more refreshed after every rinse.
Materials and Tools
Essentials
Before you start building your outdoor shower, you need to gather the right materials and tools. This step makes the whole process smoother and helps you avoid last-minute trips to the store. Here’s what you’ll need for a basic diy outdoor shower kit:
Shower head (filtered options like the Cobbe DS Filter Shower Head work great)
Shower arm connector and mounting hardware
Connectors and fittings for water lines
Base plate or bracket to secure the shower to a wall or post
Supply lines (PEX piping is a popular choice)
Thread tape for leak-proof connections
You’ll also want some basic tools:
Adjustable wrench and pliers
Power drill with bits
Screwdrivers
Measuring tape and pencil
Most people spend between $66 and $158 for the shower head and supplies. If you hire someone to help, the total cost for installation and labor can range from $174 to $446 per outdoor shower. This covers delivery, setup, and basic work, but not permits or big changes to your plumbing.
Tip: Double-check your list before you start. Having everything ready saves time and keeps your diy project on track.
Budget Options
You don’t have to spend a lot to enjoy an outdoor shower. If you want to save money, try these budget-friendly ideas:
Use a garden hose bibb as your water source. This skips tricky plumbing and makes setup easy.
Pick up garden hose adapters and flexible supply lines. These connect your water source to the shower valve without fuss.
Choose PEX piping for water lines. It’s cheap, easy to cut, and simple to install.
Shark Bite push-fit fittings let you connect pipes without soldering. Just push them together—no special skills needed.
Grab a PEX cutting tool (about $10), plus basic tools like pliers, a wrench, and a drill.
With these tips, you can build a diy outdoor shower kit for under $100. You don’t need a plumber, and you can finish your diy project in a weekend. This way, you get all the fun of an outdoor shower without breaking the bank.
Site Prep
Getting your site ready is a big step in building your outdoor shower. You want a spot that feels sturdy and safe. Good prep work helps your shower last for years.
Measuring and Marking
Start by grabbing your measuring tape and a pencil. Measure the area where you want your outdoor shower. Mark the corners with stakes or chalk. This helps you see the space and plan your layout. Make sure you leave enough room for moving around and for any extras you want, like a bench or hooks.
Check the ground for bumps or dips. Use a shovel to clear away grass, rocks, or roots. Level the ground as much as you can. A flat surface makes everything easier later. If you use a diy outdoor shower kit, follow the instructions for the right size and shape.
Tip: Double-check your measurements before you start building. This saves you time and trouble.
Framing and Flooring
Now you can build the frame and floor for your outdoor shower. Use wood, concrete, or pavers for a strong base. Lay out the frame first. Make sure it fits your marked area. Secure the corners with screws or brackets.
Add flooring that drains well. Gravel, decking, or non-slip tiles work great. These keep water from pooling and help you stay safe. If you want a simple diy project, try using wooden pallets or pre-made deck tiles.
A sturdy frame and good flooring keep your outdoor shower stable. You get a safe, comfortable spot to rinse off after a swim or a day in the garden.
A solid base means your outdoor shower will last longer and need less fixing later.
Plumbing Install
Getting your plumbing right is the heart of any outdoor shower project. You want water to flow smoothly and safely every time you turn on your outdoor shower system. Let’s walk through each step so you can feel confident about your shower installation.
Supply Lines
Start by planning your water supply lines. Most people use PEX piping for an outdoor shower system. PEX is flexible, easy to cut, and stands up well to outdoor weather. You can run PEX from your home’s main water line or connect it to a garden hose if you want a simple setup. Use proper fittings to join the pipes. Push-fit connectors make the job quick and don’t need special tools.
Before you dig or drill, check your local building codes and see if you need a permit. Some towns have rules about outdoor plumbing. It’s always better to ask first than to fix mistakes later.
Tip: Use a valve guard to protect your pipes from bumps and weather. This keeps your diy outdoor shower kit working longer.
Lay out your supply lines along the path you marked earlier. Secure them to posts or walls with pipe straps. If you want both hot and cold water, run two lines and label them clearly. Make sure the pipes slope slightly so water drains out when you shut off the shower. This helps prevent freezing in cold weather.
Shower Valve
The shower valve controls the water flow and temperature. Pick a valve made for outdoor use. Brass or stainless steel valves last longer and resist rust. Mount the valve at a comfortable height—usually about waist level. Use the right fittings to connect your supply lines to the valve.
If you want to adjust the temperature, choose a mixing valve. This lets you blend hot and cold water for the perfect shower. Tighten all connections with a wrench, but don’t overdo it. Too much force can crack the fittings.
Note: Always wrap threaded connections with plumber’s tape. This helps stop leaks before they start.
Once you install the valve, attach the shower arm and head. The Cobbe DS Filter Shower Head is a great choice here. It’s easy to install and gives you clean, filtered water every time you use your outdoor shower.
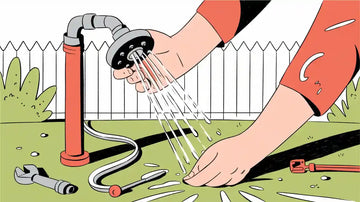
Leak Check
Now it’s time to check for leaks. This step keeps your outdoor shower safe and saves water. Turn on the water slowly and watch every joint and fitting. Look for drips or wet spots. Sometimes leaks hide in hard-to-see places, so take your time.
You can use several methods to find leaks:
Do a visual inspection. Look for water drops or damp areas around pipes and fittings.
Try tracer dyes. Add a few drops to the water and watch for color showing up where it shouldn’t.
Listen for hissing or dripping sounds. Acoustic listening devices can help if you have pipes behind walls or under a deck.
Use a smoke tester. Blow smoke into the pipes and see if it escapes anywhere.
Check with a thermal camera. Cold water leaking from a pipe will show up as a cool spot.
Do a pressure test. Block off the ends of the system and watch for pressure drops.
Install a smart leak detector. These devices alert you if they sense water where it shouldn’t be.
If you find a leak, turn off the water and tighten the fitting. If the leak continues, replace the connector or fitting. Don’t skip this step—leak checks keep your outdoor shower system running smoothly for years.
Pro Tip: Test your system before you finish covering any pipes or closing up the frame. Fixing leaks is much easier when everything is still open.
Mounting the Outdoor Shower Head
Shower Arm
You have reached the exciting part—mounting the shower arm for your outdoor shower. This step sets the stage for a sturdy and reliable setup. Start by picking a spot on your frame or wall where you want the shower arm to go. Most people choose a height that feels comfortable, usually around 6 to 7 feet from the ground.
When you pick a shower arm, look for one made from solid brass or stainless steel. These metals stand up to rain, sun, and wind. They do not rust or bend easily. If you want to adjust the angle or length, try an adjustable shower arm extender. Some extenders stretch out 12 to 16 inches, which gives you more space to move under the water. Make sure the locking gears or set screws feel strong. This keeps the arm from drooping, even if you use a heavier outdoor shower head.
J-style shower arms are another great choice. They let you change the angle and length, so you can aim the water just right. Always check that the threading is solid and the arm feels heavy in your hand. A wide flange at the base helps stop water from sneaking into your wall or frame.
Tip: Use a level to make sure your shower arm sits straight. This small step makes your outdoor shower look neat and work better.
Head Attachment
Now it is time to attach your outdoor shower head. This part is simple, but you want to do it right for the best results. First, wrap plumber’s tape around the threads of the shower arm. This helps prevent leaks. Next, screw the shower head onto the arm by hand. Turn it until it feels snug, but do not force it. If you use a filtered model like the Cobbe DS Filter Shower Head, you get clean water and a spa-like feel every time.
Some shower heads, like rain or dual heads, weigh more than basic models. Make sure your shower arm can handle the weight. All-metal arms with deep locking gears or set screws work best for these. They keep the head steady and stop it from moving or drooping.
Here are some features to look for in a head attachment:
All-metal construction for strength and rust resistance
Secure locking features to prevent movement
Wide flange coverage to block water from getting behind the wall
Compatibility with heavier heads, such as rain or dual shower heads
If you want a wall mounted outdoor shower, double-check that the mounting bracket lines up with your frame or wall studs. Tighten all screws and fittings, but do not over-tighten. This keeps your setup safe and leak-free.
A sturdy mount means you can enjoy your outdoor shower for years without worry. Take your time and check each step as you go.
Testing
Water Flow
Now comes the fun part—testing your new outdoor shower. Turn on the water slowly and watch how it flows from the shower head. You want a steady stream that feels strong but not too harsh. If you use a filtered shower head like the Cobbe DS Filter Shower Head, you should notice the water feels softer on your skin. Step under the spray and check if the water covers your whole body. Move around to see if the angle works for you.
If you see water spraying in odd directions, check the shower head and arm. Sometimes, a quick twist or a little tightening fixes the problem. Look at the ground to make sure water drains away and does not pool around your feet. Good drainage keeps your outdoor shower area safe and clean.
Tip: If you notice weak water flow, check for kinks in the supply line or make sure the valve is fully open.
Adjustments
You might need to make a few tweaks to get your outdoor shower just right. Try changing the spray mode if your shower head offers options. The Cobbe DS Filter Shower Head lets you pick from rain, massage, mist, water-saving, or power wash. Find the setting that feels best for you.
Adjust the shower arm if you want the water to hit a different spot. Some arms let you move them up, down, or side to side. If you see leaks, turn off the water and tighten the fittings. Sometimes, adding more plumber’s tape helps stop drips.
Test your outdoor shower system a few times before calling it done. Invite family members to try it out. Everyone can give feedback on the height, spray, and comfort. Small changes now make your outdoor shower perfect for daily use.
Customization
Spray Modes
You can make your outdoor shower feel like a spa by choosing the right spray mode. Many shower heads let you switch between different sprays. You might want a gentle rain for relaxing or a strong massage to wash away dirt after a long day. Some models even offer a mist setting, which feels cool on hot afternoons. If you use a shower head like the Cobbe DS Filter Shower Head, you get five spray modes. You can change the setting with one hand, so it is easy to find your favorite. Try each mode and see which one you like best. Your outdoor shower should fit your mood and needs every time.
Accessories
Adding the right accessories can make your outdoor shower even better. Here are some popular choices:
Multi-head systems with body jets for a full-body massage
Filtration shower heads for cleaner, healthier water
Aromatherapy diffusers to add relaxing scents
Teak wood accents or stone mosaic floors for a natural look
Finishes like matte black or brushed nickel for modern style
Corrosion-resistant materials to keep your shower looking new
Flexible supply lines for easy setup
Anti-clog nozzles and air technology for a strong, gentle flow
Tip: Pick accessories that match your style and make your outdoor shower more comfortable.
Style Ideas
You can get creative with your outdoor shower design. Some people build a freestanding outdoor shower with a simple frame and wood slats. Others use stone or tile for a more polished look. Try adding plants or bamboo screens for privacy and a tropical feel. Use marine-grade hardware to keep everything sturdy and rust-free. If you want a modern vibe, choose sleek finishes and clean lines. A few well-chosen details can turn your outdoor shower into a backyard highlight.
Maintenance
Cleaning
Keeping your outdoor shower clean helps it last longer and look great. Dirt, leaves, and soap scum can build up over time. You should rinse the shower area with a hose once a week. Use a soft brush to scrub the floor and walls. For tough spots, mix a little dish soap with warm water. Wipe down the shower head and arm to stop mineral buildup. If you see mold or mildew, spray it with a mix of vinegar and water. Let it sit for a few minutes, then scrub and rinse.
Tip: Clean your shower after heavy rain or storms. This keeps mud and debris from sticking around.
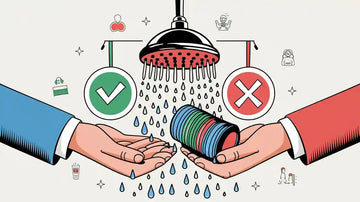
Filter Replacement
If you use a filtered shower head, like the Cobbe DS Filter Shower Head, changing the filter keeps your water fresh and safe. Most filters last about 2 to 3 months, but check the instructions for your model. You might need to change it sooner if your water is hard or you use the shower a lot. To replace the filter, twist off the shower head, take out the old filter, and pop in a new one. Make sure everything fits tight before you use the shower again.
Write the date on your calendar when you change the filter.
Keep extra filters on hand so you never run out.
Winterizing
If you live where it gets cold, you need to winterize your outdoor shower before freezing weather hits. Start by turning off the water supply. Open the valve and let all the water drain out. Disconnect the shower head and store it indoors if possible. Wrap any exposed pipes with foam insulation or towels. This stops them from freezing and cracking.
Note: Winterizing protects your outdoor shower and saves you from costly repairs in spring.
You just learned how simple it is to set up your own outdoor shower. You get to enjoy fresh air, clean water, and a stylish spot right in your backyard. A filtered shower brings comfort and helps your skin feel great. Ready to start? Try these tips and make your outdoor shower even better. You can always add upgrades or take care of it each season for long-lasting fun.
FAQ
How do I keep my outdoor shower from freezing in winter?
You should turn off the water supply and drain all the pipes. Remove the shower head and store it inside. Wrap any exposed pipes with foam insulation. This protects your shower from freezing temperatures.
Can I use hot water in my outdoor shower?
Yes! You can connect your outdoor shower to your home’s hot water line. Use a mixing valve to control the temperature. Always check your setup for leaks before using hot water.
How often should I replace the filter in my Cobbe DS Filter Shower Head?
You should replace the filter every 2 to 3 months. If your water is hard or you use the shower a lot, check the filter more often. Fresh filters keep your water clean and safe.
What is the best way to clean my outdoor shower?
Rinse the area with a hose once a week. Use a soft brush and mild soap for tough spots. Wipe down the shower head to stop mineral buildup. Clean after storms to keep your shower looking great.
Do I need a permit to install an outdoor shower?
Some towns require a permit for outdoor plumbing. Always check your local building codes before you start. This helps you avoid problems and keeps your project safe and legal.