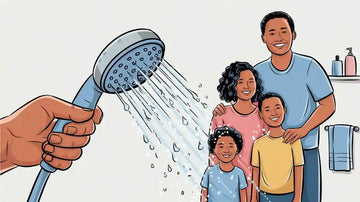
Upgrading your RV shower can significantly enhance your experience. Adding a handheld shower head, such as the Cobbe DS Filter Shower Head, improves water pressure and provides you with cleaner and healthier water. Showering in an RV should feel nice and refreshing, and a quality RV shower head makes this possible. Why not invest in a better shower head today?
Key Takeaways
Switching to a handheld shower head, like the Cobbe DS Filter Shower Head, boosts water pressure and gives cleaner water for a nicer shower.
Get the needed tools: an adjustable wrench, plumber's tape, and a soft cloth to make the job easier.
Follow the steps closely, like turning off the water, cleaning the shower arm, and using plumber's tape to stop leaks.
Tools and Materials for Installing an RV Shower Head
Tools You’ll Need to Get Started
Before beginning, gather tools to make the job easier. Here’s what you’ll need:
Adjustable wrench: Loosens and tightens parts without causing damage.
Plumber’s tape: Also called Teflon tape, it stops leaks by sealing tightly.
Soft cloth or towel: Protects your shower arm or fittings from scratches.
Bucket or container: Catches any water that drips during the work.
Having these tools ready will save time and avoid problems.
Materials You’ll Use, Featuring the Cobbe DS Filter Shower Head
Now, let’s look at the materials. The main item is the Cobbe DS Filter Shower Head, a great choice for your RV. Here’s why it’s worth it:
It’s made of strong materials like stainless steel and sturdy plastic.
Its design boosts water pressure and reduces leaks.
The 20-stage filter removes over 99% of chlorine and dirt for cleaner water.
It has a lifetime warranty, proving its quality and reliability.
You’ll also need:
Low-flow shower head adapter (optional): Saves water but keeps good pressure.
Replacement hose (if needed): Make sure it fits your RV’s plumbing.
With these materials, you’re ready to install a handheld shower head in your RV. This upgrade will make your showers better and more efficient.
Step-by-Step Guide to Installing an RV Shower Head
Step 1: Turn Off the RV Water Supply
Before you start, turn off the water supply to your RV. This step prevents water from spraying everywhere when you remove the old shower head. Locate the water control valve, usually found near the RV’s water pump or under the sink, and turn it off. If you’re unsure where it is, check your RV’s manual for guidance.
Pro Tip: Open a faucet to release any remaining water pressure in the system. This will make the process cleaner and easier.
Step 2: Remove the Old Shower Head
Use an adjustable wrench to loosen the old shower head. Turn it counterclockwise until it comes off. If it’s stuck, wrap a soft cloth around the fitting to protect it from scratches, then try again. Once removed, inspect the shower arm for any damage or buildup.
Note: If you notice mineral deposits or corrosion on the old shower head, soak it in vinegar for a few hours. This can help break down chalky deposits and make it easier to clean.
Step 3: Clean the Shower Arm Threads
Cleaning the shower arm threads is crucial to prevent leaks during the installation process. Follow these steps:
Remove any old plumber’s tape or sealant from the threads.
Dry the threads thoroughly with a towel.
Inspect the threads for debris, mineral buildup, or corrosion.
If needed, soak the threads in vinegar and scrub gently with a soft brush.
Taking the time to clean the threads ensures a smooth and secure connection for your new handheld shower head.
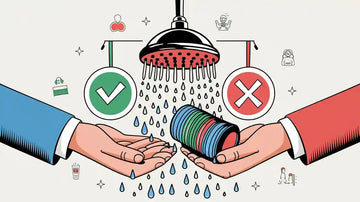
Step 4: Apply Plumber’s Tape to Prevent Leaks
Plumber’s tape, also known as Teflon tape, is essential for creating a watertight seal. Here’s how to apply it:
Start wrapping the tape on the second thread of the shower arm.
Wrap it tightly in the same direction as the threads.
Ensure the tape is smooth and even, covering all the threads.
Type of Tape |
|
|---|---|
Putty tape |
Effective |
Butyl tape |
Effective |
Foam tape |
Effective |
Properly applied plumber’s tape will help prevent leaks and ensure a secure fit for your new shower head.
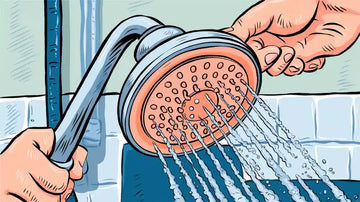
Step 5: Attach the New Handheld Shower Head
Now it’s time to install the handheld shower head. Take the Cobbe DS Filter Shower Head and screw it onto the shower arm. Turn it clockwise until it’s snug. If your shower head comes with a hose, connect one end to the shower head and the other to the shower arm.
The Cobbe DS Filter Shower Head is designed to enhance water flow and pressure, making showering in an RV feel more like a home experience. Its advanced filtration system also ensures cleaner, healthier water.
Step 6: Secure Connections Without Over-Tightening
Tighten the connections by hand or with a wrench, but don’t overdo it. Over-tightening can damage the threads or crack the fittings. Tighten just enough to ensure the connections are secure.
Tip: If you notice any resistance while tightening, stop and check the alignment of the threads. Misaligned threads can cause leaks or damage.
Step 7: Test for Leaks and Adjust the Shower Head
Turn the RV water supply back on and test your new shower head. Check for leaks at the connection points. If you see any, turn off the water and tighten the connections slightly. Adjust the angle of the shower head to your liking.
The Cobbe DS Filter Shower Head features multiple spray modes, so take a moment to explore them. Whether you prefer a relaxing rain shower or a powerful massage spray, this shower head has you covered.
Step 8: Enjoy Your Upgraded Showering Experience in an RV
Congratulations! You’ve successfully installed the handheld shower head. Now, enjoy the benefits of better water pressure, cleaner water, and a more enjoyable showering experience in your RV. The Cobbe DS Filter Shower Head’s innovative design ensures consistent performance, even in low-pressure conditions.
Fun Fact: By upgrading to a high-performance shower head, you can save up to 2,700 gallons of water annually while still enjoying a powerful shower.
Troubleshooting Common RV Shower Head Installation Issues
Even with the best tools and materials, you might encounter a few hiccups when installing your RV shower head. Don’t worry—most issues are easy to fix with a little know-how. Let’s tackle the most common problems you might face.
Fixing Leaks at the Connection Point
Leaks at the connection point can be frustrating, but they’re usually simple to resolve. Here’s what you can do:
Check the plumber’s tape: Make sure you’ve wrapped the threads of the shower arm with plumber’s tape. If the tape looks loose or uneven, remove it and reapply a fresh layer. Wrap it tightly in the same direction as the threads.
Inspect the fittings: Look for cracks or damage in the fittings. If you spot any, replace the damaged part.
Use flexible connectors: These connectors can help prevent leaks by creating a more secure seal. They’re especially useful if your RV plumbing uses PEX pipes.
Try quick-connect fittings: These fittings make installation easier and reduce the chances of leaks. They’re a great option for RV plumbing systems.
Tip: If you’re still dealing with leaks, double-check that all connections are hand-tightened before using a wrench. Over-tightening can cause damage and lead to more leaks.
Ensuring Proper Fit for the Shower Head
Getting the right fit for your RV shower head is crucial for smooth operation. Here’s how to ensure everything fits perfectly:
Choose a shower head specifically designed for RVs. These models are built to work with the lower water pressure typical in RVs.
Check the fittings. Most RV shower heads use standard 1/2" connections, but it’s always a good idea to confirm compatibility with your RV’s plumbing system.
Purchase the shower head and hose together. This ensures the two components work seamlessly.
Opt for a longer hose. A longer hose gives you more flexibility for cleaning and showering in tight RV spaces.
Use silicone caulk if needed. If the new shower head doesn’t cover the holes left by the old one, apply silicone caulk to seal them.
Pro Tip: If you’re unsure about compatibility, consult your RV’s manual or ask an expert at your local RV supply store.
Improving Water Pressure in Your RV Shower
Low water pressure can make showering in an RV less enjoyable. Luckily, there are ways to boost it:
Clean the shower head: Mineral buildup can block the nozzles and reduce pressure. Soak the shower head in vinegar for a few hours, then rinse it thoroughly.
Check the water pump: A weak or failing water pump can affect pressure. Inspect your RV’s pump and replace it if necessary.
Install a high-pressure shower head: The Cobbe DS Filter Shower Head is a great choice for RVs. It’s designed to enhance water flow, even in low-pressure systems.
Inspect the water lines: Look for kinks or blockages in the water lines. Straighten any kinks and clear out debris to improve flow.
Use a low-flow adapter: This might sound counterintuitive, but a low-flow adapter can help maintain consistent pressure while reducing water usage.
Fun Fact: Did you know that upgrading to a high-performance shower head can improve your RV’s water usage efficiency without sacrificing pressure? It’s a win-win for comfort and conservation!
By addressing these common issues, you’ll ensure your RV shower head works perfectly, giving you a refreshing and hassle-free showering experience.
Installing an RV shower head is easier than you might think. With just a few tools, you can upgrade your showering in an RV to a whole new level. The Cobbe DS Filter Shower Head offers better water pressure and filtration. Why wait? Transform your RV shower today and enjoy every moment on the road!
FAQ
Why is the Cobbe DS Filter Shower Head great for RVs?
Its small size, strong water pressure, and 20-stage filter make it ideal. It gives you cleaner water and a nicer shower experience.
Will the Cobbe DS Filter Shower Head work in any RV?
Yes, it works with most RVs that have standard 1/2" plumbing. Check your RV manual to make sure it will fit before installing.
How can I keep my RV shower head working well?
Clean it often to stop mineral buildup. Soak it in vinegar, then rinse it well. This helps keep water pressure strong and the filter working properly.