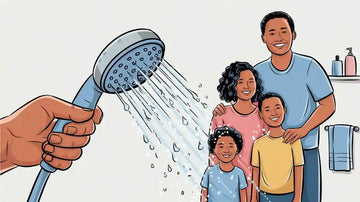
Upgrading your RV shower head can make showers feel amazing. Picture enjoying a strong, refreshing stream of water every day. It not only feels good but also helps your skin and hair. A modern showerhead, like the Cobbe DS Filter Shower Head, does even more. It has a special filter that cleans the water for healthier showers. It also saves water while still giving a strong flow. Did you know regular showerheads use up to 2.5 gallons a minute? Switching to a better one can save water and improve your showers.
Key Takeaways
Changing your RV shower head improves water flow and comfort.
Get tools like a wrench and plumber's tape for easy work.
Pick a strong, simple-to-use shower head that fits your RV.
Check the shower arm and hose for damage to avoid leaks.
Clean and check your shower head often for good water flow.
Gather Tools and Materials
Tools needed for the replacement
Before starting, gather the tools you’ll need. You don’t need anything complicated, just basic items to help. Here’s what to have:
Adjustable wrench: Loosens and tightens parts without causing damage.
Plumber’s tape: Stops leaks by sealing threads tightly.
Cleaning cloth: Cleans dirt or dust off the shower arm.
Wondering why these tools matter? Here’s a simple explanation:
Feature |
Description |
|---|---|
Durability |
Strong stainless steel hose built to last a long time. |
Installation Ease |
Comes with all parts needed for quick setup. |
Water Efficiency |
Saves water while still giving good pressure. |
Performance Enhancements |
Uses air-turbo tech for faster water flow and comfort. |
Compact Design |
Small size fits perfectly in RV bathrooms. |
Having these tools ready makes replacing the showerhead easy and stress-free.
Selecting the right RV shower head
Picking the right RV shower head is important for better showers. Not all showerheads are the same, so here’s how to choose:
Ease of Use: Pick one that’s easy to install and hold. Hand-held types are very useful.
Design: Features like adjustable sprays or comfy grips make a big difference.
Durability: Choose strong materials that last a long time.
Performance: Find one with strong water flow and adjustable settings.
The Cobbe DS Filter Shower Head is a great choice. It’s made for RVs, has five spray options, and filters water for healthier showers.
Additional items to ensure a smooth installation
To make installation easier, keep these extras nearby:
Bucket or towel: Catches water drips while you work.
Replacement washers: Rubber rings that seal connections tightly.
Instruction manual: Always helpful if your showerhead comes with one.
With these items ready, upgrading your shower will be quick and simple.
Remove the Old Shower Head
Turn off the water supply
Before you start, make sure to turn off the water supply to your RV. This step is crucial to avoid leaks or accidental water sprays while working. Locate the main water valve in your RV and shut it off completely. If you're unsure where it is, check your RV's manual for guidance.
Tip: Double-check that the water is off by turning on a faucet. If no water flows, you're good to go!
Turning off the water supply not only prevents messes but also ensures your safety. Plumbing experts recommend this step to avoid hazards like water damage or scalding from hot water systems.
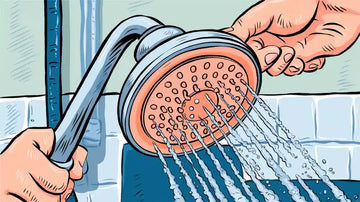
Detach the old showerhead
Now that the water is off, it's time to remove the old showerhead. Grab your adjustable wrench and gently loosen the connection where the showerhead attaches to the hose or shower arm. If it's stuck, wrap a soft cloth around the connection to protect it and apply steady pressure.
Here’s a simple step-by-step guide to help you:
Use the wrench to turn the showerhead counterclockwise.
Once loose, unscrew it by hand.
Keep a bucket or towel nearby to catch any leftover water drips.
Sometimes, removing an old showerhead can reveal hidden issues. You might notice dripping from the handle or missing parts like washers. These are signs that the old showerhead may have been faulty.
Inspect the shower arm and hose for wear or debris
Before installing your new showerhead, take a moment to inspect the shower arm and hose. Look for any signs of wear, such as cracks, rust, or buildup. Use a cleaning cloth to wipe away dirt or debris that could interfere with the new installation.
Here’s a quick checklist to guide your inspection:
Factor |
Description |
|---|---|
Material Quality |
Check if the hose or arm is made of durable materials like stainless steel. |
Operating Pressure |
Ensure there are no signs of damage from high water pressure. |
Environmental Factors |
Look for wear caused by moisture or exposure to chemicals. |
Flexing and Bending |
Inspect for kinks or bends that could weaken the hose over time. |
Note: If you find any damage, consider replacing the hose or shower arm to avoid future leaks.
Taking the time to inspect these components ensures your new rv shower head will work perfectly and last longer.
Prepare the New Shower Head
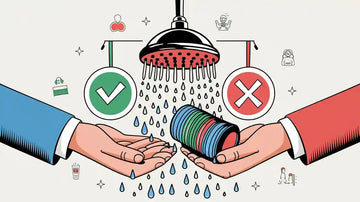
Verify compatibility with your RV system
Before installing your new showerhead, make sure it’s compatible with your RV’s plumbing system. Most RVs use a standard ½-inch NPT fitting, which works with many showerheads, including the Cobbe DS Filter Shower Head. Some models even come with adapters to fit unique setups.
Here’s how to check compatibility:
Look at your RV’s shower arm connection. If it’s a ½-inch fitting, you’re good to go.
If your RV has a tankless water system, ensure the showerhead connects to the non-pressurized side of the water pump.
Review the product manual or packaging for any special installation instructions.
Taking a few minutes to confirm compatibility saves you from potential headaches later.
Apply plumber’s tape to prevent leaks
Plumber’s tape is your best friend when it comes to leak prevention. It creates a tight seal between the showerhead and the shower arm, ensuring water flows where it’s supposed to.
Follow these steps to apply it:
Clean the threads on the shower arm with a cloth to remove dirt or old tape.
Wrap the plumber’s tape around the threads in a clockwise direction. Two to three layers should do the trick.
Press the tape firmly to ensure it sticks.
Tip: Always wrap the tape in the same direction you’ll screw on the showerhead. This prevents it from unraveling during installation.
Assemble components for installation
Now it’s time to get everything ready for installation. Most modern showerheads, like the Cobbe DS, come with all the parts you need, including hoses and washers.
Here’s a quick checklist to guide you:
Attach the rubber washer to the shower arm. This helps create a watertight seal.
Screw the hose onto the shower arm, tightening it by hand. Use a wrench only if necessary.
Connect the showerhead to the other end of the hose. Make sure it’s snug but not over-tightened.
If you’re unsure about any step, refer to the instruction manual or watch a quick tutorial online. Preparing your new rv shower head properly ensures a smooth installation and a leak-free experience.
Install the New Shower Head
Attach the hose to the faucet securely
To start, you’ll need to attach the hose to the faucet. This step is crucial for ensuring a steady water flow and preventing leaks. Here’s how you can do it:
Check the faucet connection for any dirt or debris. Wipe it clean with a cloth.
Screw the hose onto the faucet by hand. Turn it clockwise until it feels snug.
Use an adjustable wrench to tighten the connection slightly. Be careful not to overtighten, as this could damage the threads.
For added safety and efficiency, consider these tips:
Use a backflow preventer (vacuum breaker) to stop water contamination.
Install a water pressure regulator to protect your plumbing system.
Keep the water pressure at 45 psi or lower to avoid damaging the hose.
Pro Tip: If you notice any leaks, unscrew the hose and apply plumber’s tape to the faucet threads before reattaching it.
Position the hose through the wall anchor
Once the hose is securely attached, it’s time to position it through the wall anchor. This step ensures the hose stays in place and doesn’t dangle awkwardly.
Locate the wall anchor on your RV’s shower setup. It’s usually a small bracket or clip designed to hold the hose.
Gently thread the hose through the anchor. Make sure it’s not twisted or kinked, as this could restrict water flow.
Adjust the hose so it hangs naturally and doesn’t pull on the faucet or showerhead.
This step might seem minor, but it plays a big role in keeping your shower area neat and functional. A properly positioned hose also reduces wear and tear, helping it last longer.
Note: If your RV doesn’t have a wall anchor, you can purchase an adhesive or screw-in bracket from a hardware store.
Connect the showerhead to the hose
Now comes the exciting part—connecting your new showerhead! This step is straightforward, but a little attention to detail goes a long way.
Take the showerhead and inspect the connection point. Ensure the rubber washer is in place inside the fitting.
Screw the showerhead onto the other end of the hose. Turn it clockwise until it’s hand-tight.
Test the connection by gently tugging on the showerhead. It should feel secure but not overly tight.
For the best results, follow these expert-recommended practices:
Make sure the hose is securely attached to both the faucet and the showerhead.
If your showerhead has a hand pump sprayer, connect it to the water container for added functionality.
Position the water container in direct sunlight to heat the water naturally, if applicable.
Quick Tip: If you’re using the Cobbe DS Filter Shower Head, double-check that the filtration system is properly aligned before attaching it to the hose. This ensures optimal performance and water quality.
With the showerhead connected, you’re almost ready to enjoy your upgraded RV shower. Just one more step—testing the installation—to make sure everything works perfectly!
Test the Installation
Turn the water back on
Now that your new showerhead is securely in place, it’s time to turn the water back on. Locate your RV’s main water valve and slowly open it. This prevents sudden pressure surges that could damage your plumbing. Once the valve is fully open, turn on the faucet connected to your rv shower head. Let the water flow for a few seconds to clear out any air trapped in the system.
Tip: If you hear sputtering or notice uneven water flow, don’t worry. This is normal when air escapes from the pipes. It should stabilize in a few moments.
Check for leaks at all connection points
After the water is running smoothly, inspect every connection point for leaks. Start at the faucet, then move to the hose and finally the showerhead. Look for water dripping or pooling around the threads. If you spot a leak, turn off the water and tighten the connection slightly.
Here’s a quick checklist to help you troubleshoot leaks:
Loose connections: Tighten by hand or use a wrench gently.
Missing plumber’s tape: Apply a fresh layer to the threads.
Damaged washers: Replace them with new ones.
Pro Tip: Keep a dry cloth handy to wipe down the connections. This makes it easier to spot even the smallest leaks.
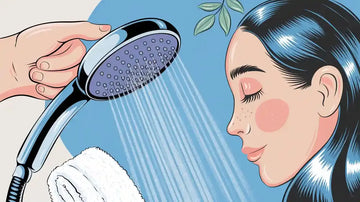
Adjust the showerhead for optimal water flow
Finally, adjust your showerhead to get the best water flow. If your model has multiple spray settings, test each one to find your favorite. Rotate the dial or switch to explore options like rain, massage, or mist. Make sure the water pressure feels comfortable and consistent.
If you’re using the Cobbe DS Filter Shower Head, you’ll love its five spray modes. Whether you want a relaxing rain shower or a powerful rinse, this showerhead delivers. Adjusting it ensures you get the most out of your upgraded shower experience.
Quick Tip: If the water pressure feels too low, check your RV’s water pump or pressure regulator. A small adjustment can make a big difference.
With everything tested and adjusted, your new rv shower head is ready to use. Enjoy your refreshing, upgraded showers on the road!
Maintenance Tips for Your RV Shower Head
Clean the showerhead often to avoid clogs
Cleaning your showerhead keeps water flowing smoothly. Over time, minerals and dirt can block the tiny holes. To stop this, clean it every few weeks.
Here’s an easy way to clean it:
Fill a bag with white vinegar.
Attach the bag to the showerhead with a rubber band.
Let it soak for a few hours or overnight.
Take off the bag and scrub the nozzles with a toothbrush.
This simple cleaning keeps your showerhead working well. It also makes sure you enjoy a great shower every time.
Tip: If you travel a lot, hard water buildup happens faster. Clean your rv shower head more often to prevent clogs.
Check for damage or wear regularly
Checking your showerhead often helps find problems early. Look at the showerhead, hose, and connections every month. Watch for cracks, rust, or leaks. If water drips or a connection is loose, tighten it or replace the part.
Notice how the showerhead works when you use it. If the water pressure feels weak, it might need cleaning or replacing. Regular checks can stop bigger problems later.
Pro Tip: Keep a small repair kit in your RV. It’s useful for quick fixes while traveling.
Change filters or parts when needed
If your showerhead has a filter, like the Cobbe DS Filter Shower Head, changing it is important. Filters can get clogged or wear out over time. Most last a few months, depending on how much you use the shower.
Here’s why replacing filters matters:
One person said changing their iron filter’s valve improved water quality.
Another user replaced a chemical pump to keep their system working well.
Many reviews show that regular maintenance keeps everything running smoothly.
Check your showerhead’s manual for how to replace filters. Changing them on time keeps your water clean and your showerhead working great.
Note: Always keep extra filters or washers nearby. These small items make a big difference in keeping your showerhead in top shape.
Changing your RV shower head is simple and quick. Follow these steps to install it easily and enjoy better showers. A new showerhead, such as the Cobbe DS Filter Shower Head, boosts water pressure and filters water for cleaner showers. Remember to clean and check it often to keep it in great shape. With minimal work, you’ll have refreshing, top-quality showers for a long time.
FAQ
What tools do I need to replace my RV shower head?
You’ll need an adjustable wrench, plumber’s tape, and a cleaning cloth. These basic tools make the process simple and hassle-free. If you’re installing a new showerhead holder, ensure you have the right screws or adhesive for secure mounting.
How often should I clean my RV shower head?
Clean your shower head every few weeks to prevent clogs caused by mineral buildup. Soaking it in vinegar overnight works wonders. If you travel in areas with hard water, consider cleaning it more frequently to maintain optimal performance.
Can I install a new showerhead without professional help?
Yes, you can! Most RV showerheads, like the Cobbe DS Filter Shower Head, are designed for easy, tool-free installation. Just follow the steps in this guide, and you’ll have your new showerhead installed in no time.
How do I know if my showerhead is compatible with my RV?
Check the fitting size of your RV’s shower arm. Most RVs use a standard ½-inch NPT fitting, which works with many showerheads. Always review the product manual to confirm compatibility before purchasing.
What should I do if my showerhead leaks after installation?
If you notice leaks, turn off the water and check the connections. Tighten them gently or reapply plumber’s tape to the threads. Inspect washers for damage and replace them if needed. These quick fixes usually solve the problem.