Have you considered using your laundry faucet for more things? Connecting a shower head to a laundry faucet is a smart DIY idea. It makes your faucet more useful for rinsing or quick showers. You’ll find it simple to improve your faucet this way.
Key Takeaways
Get tools like a wrench, Teflon tape, and pliers first. Being ready helps you work faster and stay calm.
Pick the correct adapter for your laundry faucet. Make sure it fits well to stop leaks and stay secure.
Check for leaks after setting it up. Turn the water on slowly and look at each connection. Tighten loose parts to stop water from spilling.
Tools and Materials Needed
Essential Tools for the Job
Before you start, gather the tools you’ll need. Having everything ready will save you time and frustration. Here’s what you’ll want to have on hand:
Adjustable wrench: This helps you tighten or loosen connections without damaging them.
Teflon tape: Also called plumber’s tape, it’s essential for sealing threads and preventing leaks.
Pliers: These are useful for gripping and holding parts securely.
Bucket or towel: Use these to catch any water that might spill during the process.
Pro Tip: If you don’t have an adjustable wrench, a pair of pliers can work in a pinch. Just be careful not to overtighten!
Materials Required for Connecting a Shower Head to a Laundry Faucet
Now, let’s talk about the materials. These are the items you’ll need to connect your shower head to the faucet:
Adapter: Choose an adapter that fits your laundry faucet. Most faucets require a standard thread adapter, but double-check the size.
Water inlet hose: This flexible hose connects the faucet to the shower head. Look for one that’s durable and long enough for your needs.
Shower head: A great option is the Cobbe DS Filter Shower Head. It’s designed for health and convenience, offering clean water and multiple spray modes.
Rubber washers: These create a tight seal between connections, reducing the chance of leaks.
Note: Make sure all materials are compatible with your faucet and shower head to avoid any fitting issues.
Step-by-Step Instructions
Step 1: Turn Off the Water Supply
First, turn off the water before starting. Find the valve under your sink. Twist it clockwise until it stops. This stops water from flowing while you work. If unsure which valve is correct, test each one. Turn them off one by one and check the faucet.
Tip: Keep a bucket or towel ready. It will catch any leftover water that drips when you disconnect parts.
Step 2: Prepare the Laundry Faucet
Now, get the faucet ready for setup. Take off any attachments like aerators or hoses. Unscrew them gently. Use pliers if they’re stuck, but don’t use too much force. This avoids damaging the threads. After removing them, clean the faucet threads with a damp cloth. This ensures a smooth connection.
Pro Tip: If the threads look dirty or worn, wrap them with Teflon tape. This helps seal the connection better later.
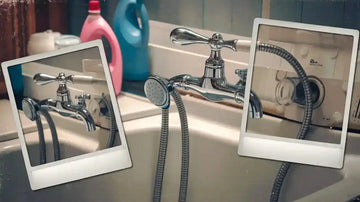
Step 3: Select and Install the Right Adapter
Pick the right adapter to connect the shower head. Adapters come in different sizes. Check your faucet’s thread size before buying one. Here’s a quick guide for some faucet types:
Specification |
Details |
|---|---|
Compatible Models |
|
Power Supply Requirement |
9V |
Amp Requirement |
0.6 amps |
Operation During Outages |
Yes, can be manually operated |
Once you have the adapter, screw it onto the faucet by hand. Tighten it gently with an adjustable wrench. Don’t overtighten, as it might damage the threads.
Step 4: Attach the Water Inlet Hose
Next, connect the water inlet hose. Attach one end of the hose to the adapter. Check that the rubber washer is inside the hose fitting. This prevents leaks. Tighten the connection by hand first. Then, use pliers to give it a slight extra turn for security.
Note: Pick a hose that’s long enough to reach where you want to shower.
Step 5: Connect the Shower Head (e.g., Cobbe DS Filter Shower Head)
Take your shower head, like the Cobbe DS Filter Shower Head. Attach it to the other end of the hose. The Cobbe DS Filter Shower Head is a great choice. It filters harmful substances and has multiple spray modes. Screw the shower head onto the hose fitting. Make sure it’s tight.
Why Cobbe? It filters water for safety and lasts a long time.
Step 6: Secure All Connections
Check all connections to make sure they’re tight. Loose connections can cause leaks or weak water pressure. Follow these steps to secure everything:
Step |
Description |
|---|---|
1 |
|
2 |
Ensure connections are insulated to avoid electrical problems |
3 |
Confirm all parts are tightly fastened |
4 |
Make sure the faucet is steady and doesn’t move |
5 |
Tighten all connections firmly |
Take your time here. A secure setup means fewer problems later.
Step 7: Test for Leaks and Adjust as Needed
Finally, turn the water back on and test the shower head. Open the valve slowly. Check for leaks at each connection. If you see drips, turn off the water. Tighten the connections a bit more.
Did you know? ASME standards say a good shower head leaks less than 0.01 gallons per minute. Testing ensures your setup meets this rule.
Try the spray modes on your Cobbe DS Filter Shower Head. Make sure everything works well. Once satisfied, enjoy your new shower head!
Troubleshooting Tips
How to Fix Leaks at the Connection Points
Leaks can be frustrating, but fixing them is easier than you think. Start by identifying where the leak is coming from. Here’s a step-by-step approach to tackle leaks:
Inspect seals and washers: Check the rubber washers at each connection point. If they look worn or damaged, replace them with new ones.
Clean components: Dirt or debris can cause leaks. Unscrew the faucet or shower head and clean the threads and seals with a damp cloth.
Test shut-off valves: Turn off the valves one by one to pinpoint the source of the leak. If the leak persists, flush out debris by gradually turning on the supply valve.
Replace O-rings: Unscrew the shower head and locate the O-ring inside. Swap it out for a new one and reattach the shower head.
Tip: Soak the aerator in white vinegar to remove mineral buildup before reinstalling it. This can improve water flow and prevent leaks.
What to Do If the Adapter Doesn’t Fit Properly
An ill-fitting adapter can disrupt your setup. If this happens, don’t worry—you’ve got options:
Double-check the thread size: Measure your faucet’s threads and compare them to the adapter. If they don’t match, you may need a different size.
Use a universal adapter: These adapters are designed to fit most faucets. They’re a great solution if you’re unsure about thread compatibility.
Wrap threads with Teflon tape: If the adapter feels loose, wrap the faucet threads with Teflon tape. This creates a tighter seal and helps the adapter fit snugly.
Note: If the adapter still doesn’t fit, consider replacing your faucet with a model that supports standard adapters.
Tips for Ensuring a Tight and Leak-Free Seal
A secure connection is key to avoiding leaks. Follow these tips to get it right:
Use rubber washers: Always include washers at every connection point. They create a watertight seal and prevent leaks.
Tighten connections properly: Hand-tighten first, then use pliers for a slight extra turn. Avoid overtightening, as it can damage the threads.
Test for leaks: After installation, check for leaks by running water through the setup. If you spot drips, tighten the connections or replace worn components.
Pro Tip: When you replace a two-handle shower valve, ensure all seals are intact before you install the new valve. This prevents leaks and ensures smooth operation.
Connecting a shower head to your laundry faucet is easier than you might think. With the right tools and steps, you’ll have a functional setup in no time. Take it slow, test for leaks, and enjoy the convenience of your new shower. It’s a simple way to upgrade your space!
FAQ
How do I know if my faucet threads are compatible with the adapter?
Check your faucet’s thread size. Most laundry faucets use standard threads, but you can measure them or consult the faucet’s manual for accuracy.
Can I use any shower head for this setup?
Yes, but a filtered shower head like the Cobbe DS Filter Shower Head is ideal. It ensures clean water and offers multiple spray modes for added convenience.
What should I do if water pressure seems low?
Inspect the connections for leaks or blockages. Clean the shower head and hose. If the issue persists, check your home’s water pressure or replace worn components.
Tip: Regularly clean your shower head to maintain optimal water flow and pressure.