Upgrading your shower can feel like a big task, but replacing a shower arm with head is surprisingly simple. You don’t need advanced skills or special tools. With just a little effort, you’ll enjoy a fresh look and better water flow. Plus, it’s a great way to personalize your bathroom space.
Key Takeaways
Get tools like a wrench and plumber's tape ready first. Being prepared makes the job easier.
Turn off the water supply before starting the work. This stops leaks and keeps things safe.
Wrap Teflon tape on the threads to seal tightly. This step helps stop leaks after you're done.
Tools and Materials for Installing a Shower Arm with Head
Before starting, gather all your tools and materials. Being prepared will make the job easier and save time.
Tools You’ll Need
You don’t need many tools, but these are helpful:
Adjustable wrench: Helps loosen or tighten the shower arm safely.
Plumber’s tape (Teflon tape): Seals the new shower arm to prevent leaks.
Soft cloth or towel: Keeps your fixtures from getting scratched.
Bucket or container: Catches leftover water when removing the old arm.
The Cobbe DS Filter Shower Head is simple to install. Its design is perfect for anyone doing DIY projects.
Materials for a Leak-Free Installation
Picking the right materials is as important as having tools. Here’s a quick guide to help you choose:
Material |
Features |
Best Use |
|---|---|---|
Stainless Steel |
Strong, rust-proof, and looks modern |
Great for homes and businesses |
Brass |
Tough, resists rust and tarnish naturally |
Best for bathrooms with lots of moisture |
Plastic |
Cheap, light, and easy to work with |
Common in rentals or budget-friendly homes |
The Cobbe DS Filter Shower Head is made with rust-proof materials for durability. Its filter improves water quality and stops limescale buildup. This helps protect your plumbing and works well with low water pressure, giving you a great shower every time.
By preparing your tools and materials first, you’ll have an easy and smooth installation process.
Step-by-Step Guide to Install the New Shower Arm
Changing a shower arm with head may seem hard. But with this guide, you’ll finish it quickly. Let’s get started!
Turn Off the Water Supply
First, turn off the water supply. This stops leaks or water spraying everywhere. Here’s why this step matters:
Clean water is needed for safety during installations.
Turning off water avoids contamination and keeps it safe.
Rules require clean water for health-related tasks.
Find your home’s main water valve and shut it off. If you don’t know where it is, check near the water meter or ask for help.
Remove the Old Shower Arm and Head
Next, take off the old shower arm and head. Use an adjustable wrench to turn the arm counterclockwise. If it’s stuck, wrap a soft cloth around it and apply gentle force.
Here are common problems people face when removing old shower arms:
Commenter |
Key Point |
|---|---|
Efficiency Advocates |
Flow restrictor testing was considered during rulemaking. |
Moen |
|
Kohler |
Small restrictors make universal testing harder. |
Once loose, unscrew the arm from the wall. Remove the showerhead too. Keep a bucket nearby to catch dripping water.
Clean the Threads and Apply Teflon Tape
After removing the old arm, check the threads inside the wall fitting. Wipe away dirt, old tape, or rust with a clean cloth. This helps the new arm fit securely.
Wrap Teflon tape around the threads 2–3 times clockwise. Make sure it’s snug but not too thick. This tape stops leaks and ensures a tight seal.
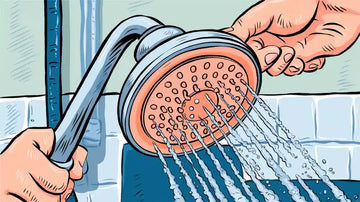
Install the New Shower Arm
Now, attach the new shower arm. Line up the threaded end with the wall fitting and screw it in clockwise. Tighten it by hand first, then use a wrench. Don’t overtighten, as it could damage the threads.
If you’re using a Cobbe DS Filter Shower Head, its rust-proof design makes installation easy. It fits most standard showers perfectly.
Attach the Showerhead
Screw the showerhead onto the other end of the arm. Tighten it by hand until it’s secure. If using a Cobbe DS Filter Shower Head, enjoy its filtration system and spray options.
For extra security, add a little Teflon tape to the threads before attaching the showerhead. This helps prevent leaks.
Test for Leaks
Finally, turn the water back on and check for leaks. Run the water and inspect all connections. If you see drips, tighten them gently with a wrench.
Leak testing ensures your setup is safe and works well. It’s like a quality check for your shower.
Once everything is fine, you’re done! Enjoy your new shower confidently.
Pro Tips for a Successful Installation
Tips for Avoiding Leaks
Leaks can be frustrating, but you can prevent them with a few simple steps. Here’s how to ensure a watertight seal and keep your shower working perfectly:
Use Teflon Tape Correctly: Wrap Teflon tape around the threads of the wall mounted shower arm. Make sure to wrap it clockwise 2–3 times. This creates a tight seal and prevents water from seeping through the threads.
Hand-Tighten First: When attaching the new shower arm with head, always start by hand-tightening it. This reduces the risk of cross-threading, which can lead to leaks. Once it’s snug, use an adjustable wrench to secure it further.
Protect the Finish: Place a soft cloth between the wrench and the shower arm to avoid scratching the surface. This is especially important for finishes like chrome or matte black.
Test for Leaks Immediately: After completing the installation, turn on the water supply and check for drips. If you notice any, tighten the connections gently until the leaks stop.
Pro Tip: Always inspect the threads inside the wall fitting before installing the new arm. Clean away any debris or old tape to ensure a smooth connection.
Here’s a quick reference table for best practices during installation:
Step |
Description |
|---|---|
6 |
Carefully screw in the new shower arm by hand to avoid cross-threading. Use an adjustable wrench to tighten it securely, protecting the finish with a cloth. |
7 |
Hand-tighten the showerhead to prevent damage, using Teflon tape on the threads for a leak-proof seal. |
8 |
Turn on the water supply and test for leaks, adjusting the showerhead as necessary. |
By following these tips, you’ll avoid common pitfalls and enjoy a leak-free shower experience.
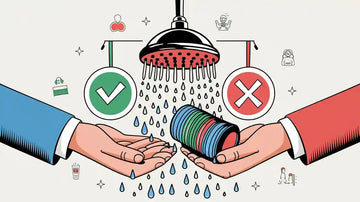
Common Mistakes to Avoid
Even a simple project like replacing a shower arm with head can go wrong if you’re not careful. Here are some mistakes to watch out for:
Skipping the Teflon Tape: Forgetting to use Teflon tape is one of the most common errors. Without it, water can seep through the threads, causing leaks. Always keep a roll handy when working on plumbing projects.
Overtightening the Connections: While it’s important to secure the shower arm and head, overtightening can damage the threads or crack the fittings. Tighten just enough to create a secure connection.
Ignoring the Wall Fitting Threads: Dirt, rust, or leftover tape on the threads can prevent a proper seal. Always clean the threads thoroughly before attaching the new wall mounted shower arm.
Using the Wrong Tools: Avoid using pliers or other tools that can scratch or damage the finish. Stick to an adjustable wrench and a soft cloth for the best results.
Skipping the Leak Test: Some people forget to test for leaks after installation. This can lead to water damage over time. Always run the water and inspect every connection before finishing the job.
Note: Regular maintenance can also prevent issues down the line. Check your showerhead and arm periodically for signs of wear or leaks.
Here’s a breakdown of common errors and how often they occur during installation:
Test Type |
Frequency in DIY Projects |
Documentation Required |
|---|---|---|
Visual inspection |
High |
Checklist with photos |
Operational verification |
Medium |
Functional test report |
Leakage testing |
High |
Calibrated test results |
Failure mode testing |
Low |
Scenario-based report |
Avoiding these mistakes will save you time and effort. Plus, it ensures your new shower setup works perfectly from day one.
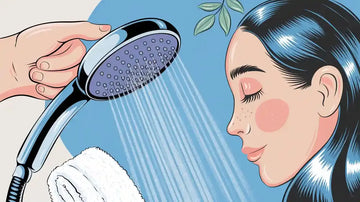
Switching out a shower arm with head is simple. Follow these steps, and you’ll finish in less than an hour. Work carefully, check for leaks, and enjoy the outcome. This easy change can update your bathroom and boost water flow.
Tip: Using the Cobbe DS Filter Shower Head gives you cleaner water and a better shower experience.
FAQ
How do I know if the shower arm is installed correctly?
After installation, turn on the water and test for leaks. If no drips appear and the showerhead works smoothly, you’ve done it right!
Can I install the Cobbe DS Filter Shower Head without tools?
Yes! The Cobbe DS Filter Shower Head is designed for tool-free installation. Just follow the instructions, turn on the water and test to ensure everything works perfectly.
How often should I replace the showerhead filter?
Replace the filter every 6-8 months, depending on water quality and usage. This keeps your water clean and ensures the best shower experience.